Views: 5 Author: Site Editor Publish Time: 2023-11-02 Origin: Site
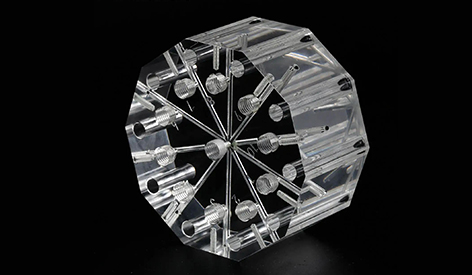
CNC machining acrylic for transparent applications requires careful handling to achieve a clear and polished finish. Here are detailed instructions for CNC machining acrylic for transparency:
1. Material Selection:
Choose high-quality transparent acrylic sheets with minimal defects or imperfections.
2. CNC Programming:
Create precise CNC machining programs to cut, mill, or engrave the acrylic. Use proper feeds and speeds to prevent melting or chipping.
3. Tool Selection:
Use sharp, high-quality cutting tools, preferably with single-flute or O-flute geometry to minimize heat generation.
4. Clamping and Fixturing:
Secure the acrylic sheet firmly on the CNC machine bed to prevent vibrations or warping during machining.
5. Machining Techniques:
Employ climb milling to reduce edge chipping and ensure smoother surface finishes.
Use low cutting speeds to minimize heat generation and melting.
Keep the spindle speed within a suitable range for acrylic (typically around 18,000-24,000 RPM).
Use air or coolant to cool the cutting tool and acrylic, preventing heat buildup.
6. Dust Collection:
Employ a dust collection system to remove acrylic debris and prevent it from scratching the surface.
7. Lubrication:
Use a lubrication system with a compatible coolant or cutting oil to reduce heat and friction during machining.
8. Surface Quality Check:
Inspect the machined surface for any imperfections, chipping, or cracks.
9. Post-Machining Cleaning:
Thoroughly clean the acrylic sheet to remove any machining residue, such as dust, oil, or coolant.
10. Polishing:
To achieve optical transparency, you'll need to polish the acrylic surface. Begin with coarser abrasives (e.g., 400-grit sandpaper) and gradually move to finer abrasives (up to 2000 grit).
Wet sand the surface with water to prevent scratching.
Consider using a buffing wheel and polishing compound for a final glossy finish.
Hand-polishing with a microfiber cloth and a plastic polish can further enhance clarity.
11. Edge Polishing:
Pay attention to edge finishing for a complete transparent look. Sand and polish the edges to match the surface clarity.
12. Protective Film:
Apply a protective film or coating to the acrylic surface to guard against scratches and maintain clarity.
13. Quality Inspection:
Inspect the machined acrylic for optical clarity, ensuring there are no visible scratches, distortions, or blemishes.
CNC machining acrylic for transparency requires precision, patience, and proper tooling. Careful attention to detail and thorough finishing will result in a clear and polished surface suitable for various transparent applications, including displays, windows, or decorative items.
ㆍFill in your requirements and upload your 2D&3D file, we will feedback your project quotation and DFM within 24 hours.
ㆍFile types: STEP, STP, IGES, IGS, SLDPRT, 3DM, SAT or X_T files File size: < 128 MB Part size: < 1500*1500*1500 mm ㆍPrivacy: We respect your privacy. Here you can find an example of a non-disclosure agreement. By submitting this form, you agree to our terms & conditions and privacy policy.